The default ClearPass service for Mac Auth uses the MAC-Auth Expiry attribute for determining if the expire time for when the account is expires. However, the default expire timestamp in Guest uses the expiry_time attribute in the Guest User Repository, and the default ClearPass Service Template does not include the necessary Authorization sources to make Mac Auth service functional. Nor does the Mac-Auth Expiry ever get set by a default service template in the endpoints repository.
To make this work, setting the attribute in the endpoint repository is required.
For the post_auth profile, set the Mac-Auth Expiry
%{Authorization:[Time Source]:Now Plus 2hrs}
You can also use the Guest user repository Expire Time attribute.
%{Authorization:[Guest User Repository]:ExpireTime}
In order for these sources to be available, you must add the Time Source to the authorization tab of the service.
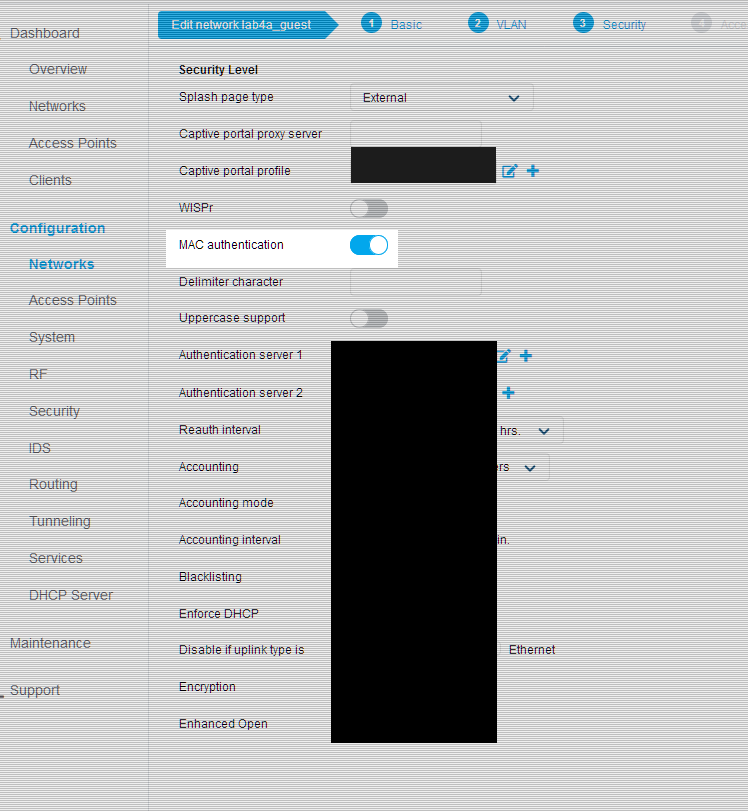
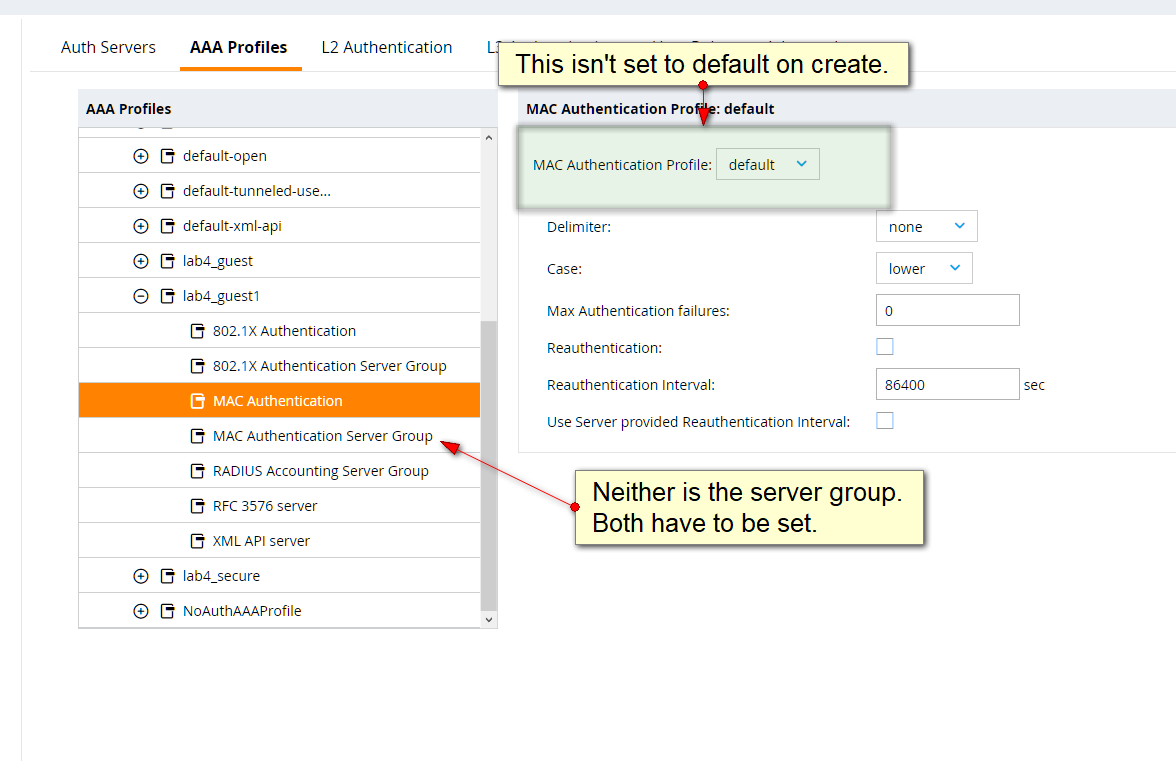
Mac authentication must be enabled or configured on ArubaOS. For Instant, its a checkbox in the security settings for the network configuration. For ArubaOS, you must setup mac authentication under AAA profiles.
Instant Mac Auth SettingController Based WLAN AOS8
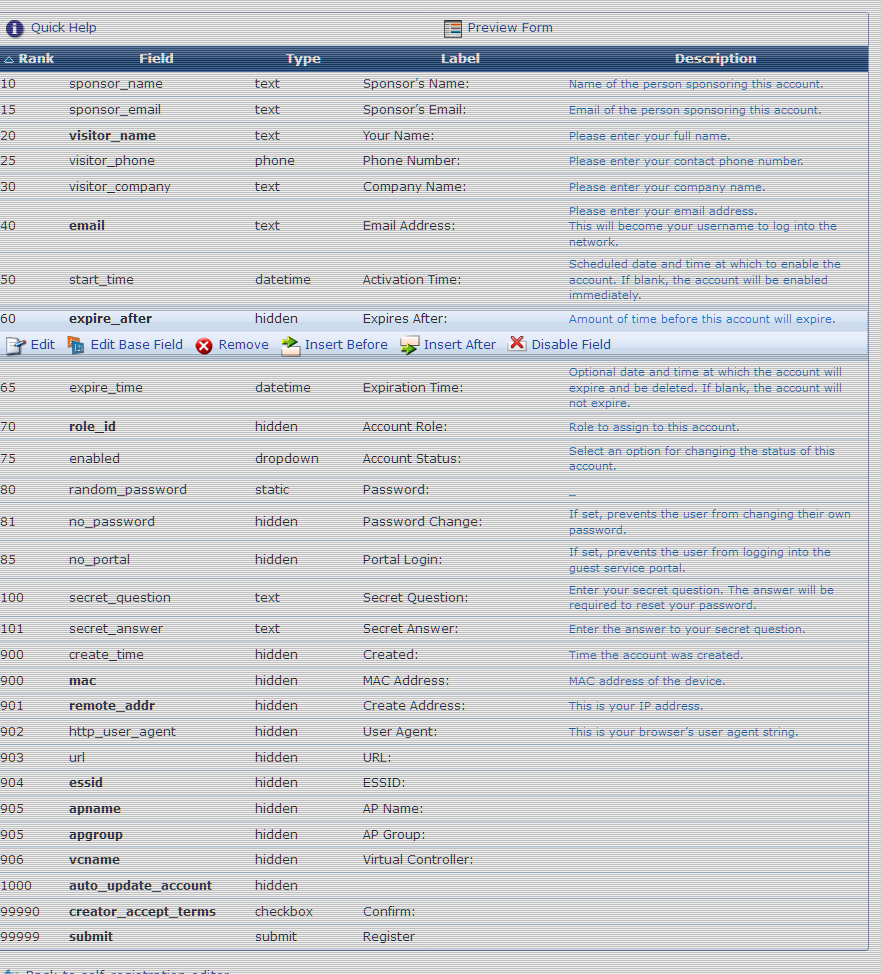
If adding a custom expiration length to an account is required, this can be done by editing the default expire after attribute in the Guest Registration form or adding a custom Time Attribute to the Time Source.
ClearPass Guest and Expire_after attributeCustom Time Attribute to Time Source
Here are some notes on getting a basic ClearPass Captive Portal page to authenticate an unknown wired client connected to a Cisco Catalyst 3560. Before this is all done, make sure the NAD has been added to ClearPass.
First.. the general algorithm
Mac Auth Service – Allow all
Radius Request
Authenticaiont Success
Radius url-redirect VSAs sent
User Sends HTTP traffic
User redirect to ClearPass Portal
User Sends Login from Portal
Web Auth Occurs
On Success- Radius CoA Terminate Session
MAC Auth Service – Reauthenticate
Radius Allow All Access VSA Sent
The first trick is to get the Wired Mac policy to classify. The default IETF attributes will not work, you must check access tracker for the correct inputs that are being sent from the authenticator (switch).
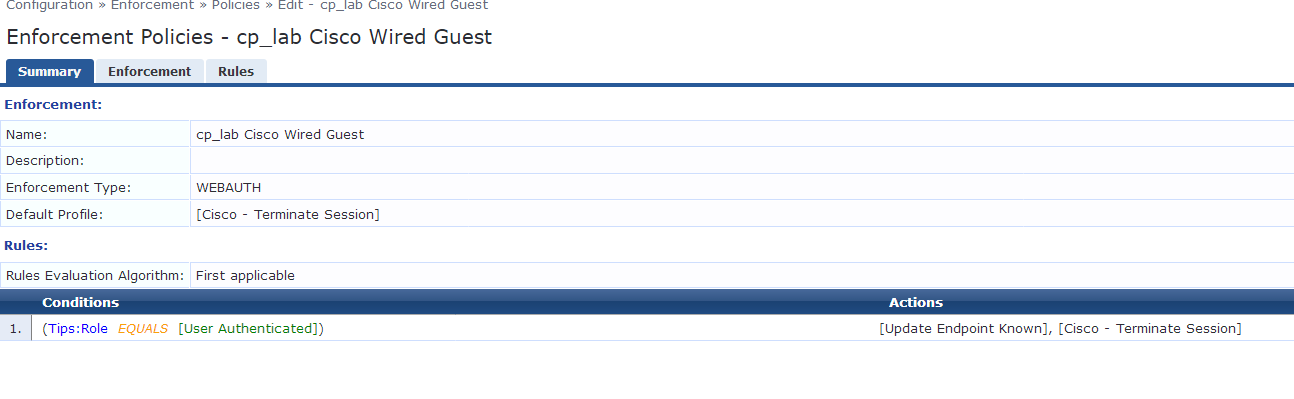
The second gotcha is the Use Cached Policy checkbox in the Enforcement tab. Its not really emphasized in the documentation, but after the web auth happens, the MAC caching policy will not pick up the role assigned unless you enable the cached policy check.
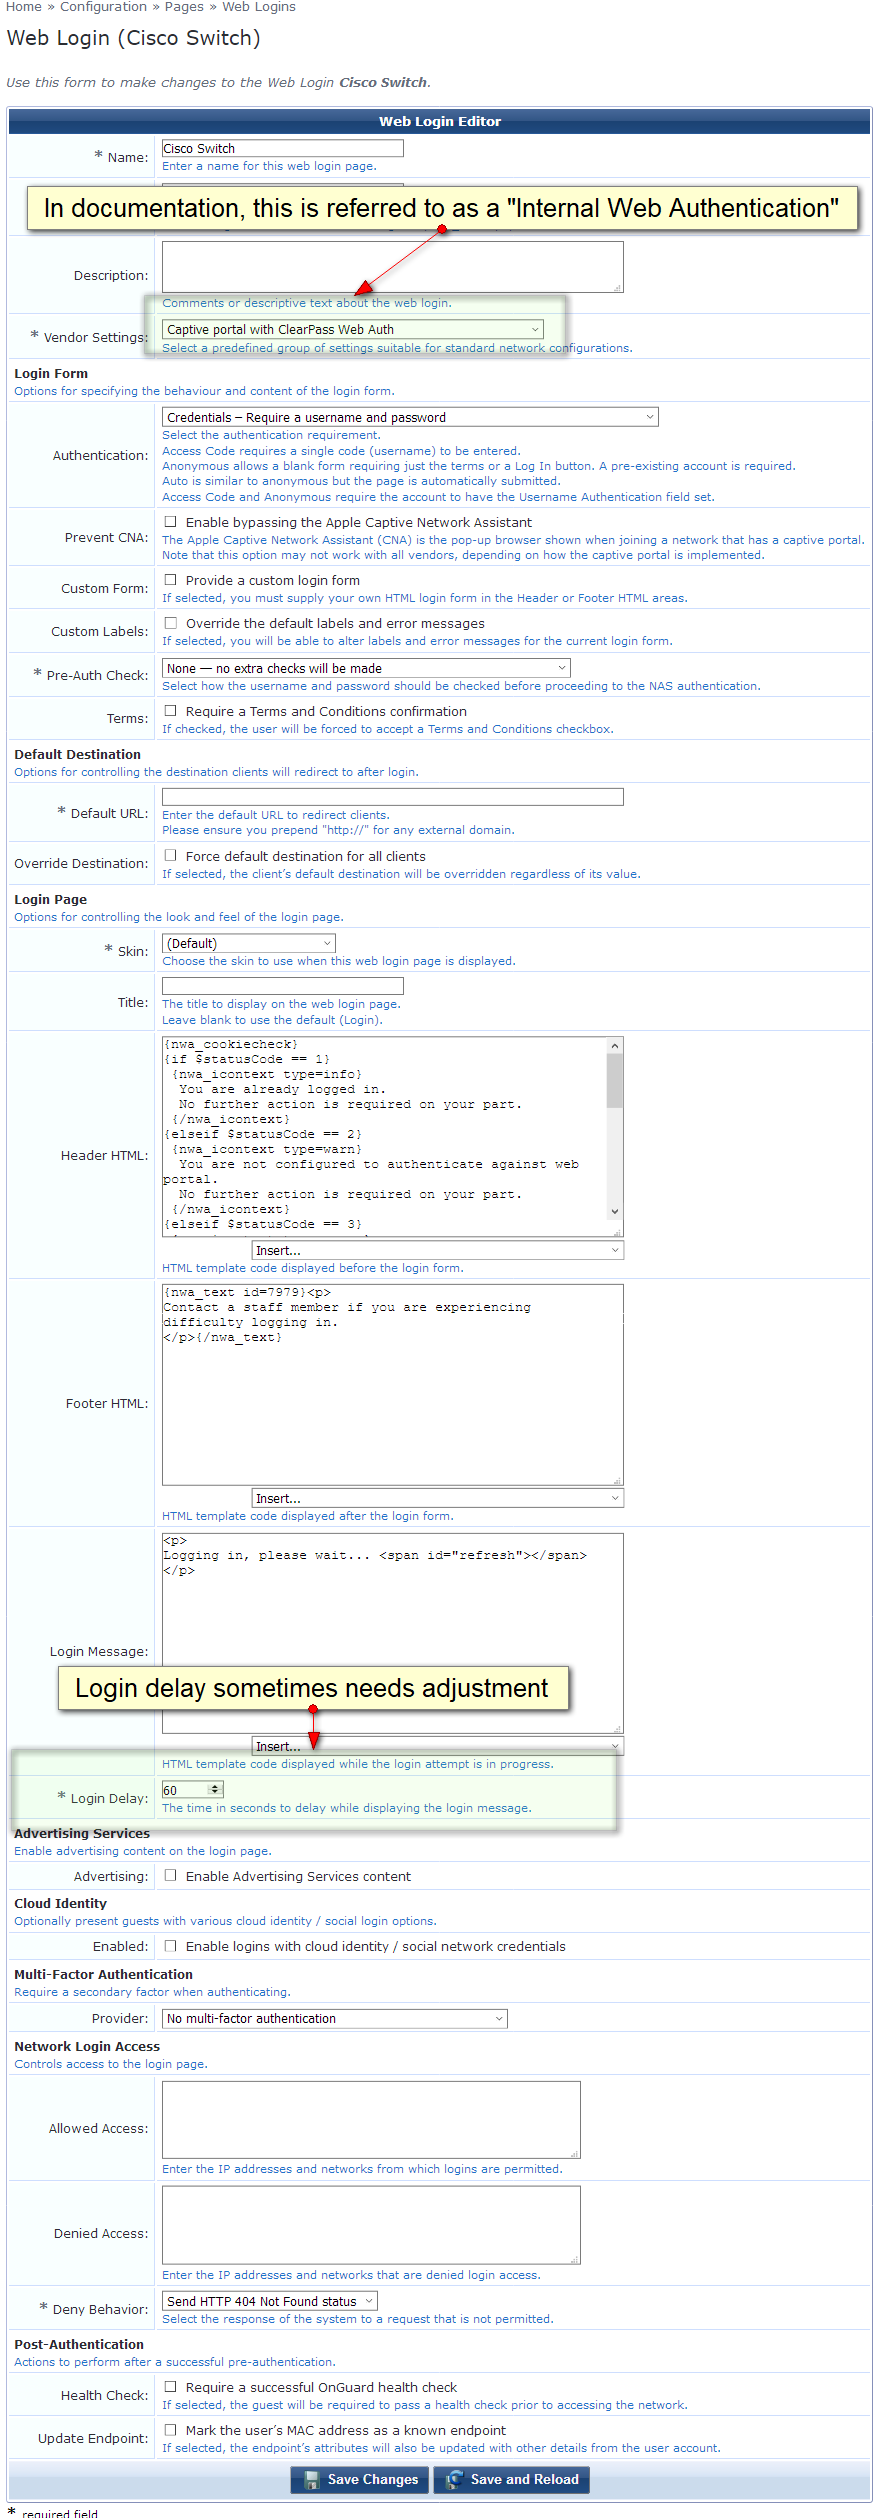
On Initial User Authentication, send the Radius VSAsYou should see access tracker assign this enforcement profilePolicy for Web AuthWeb Login Page Settings
There are many pages on Aruba’s documentation sites that document the required switch configuration, the main configuration lines are the following:
aaa new-model
interface VlanXXX ip address 192.168.X.XXX 255.255.255.0 ip helper-address <CP_IP>
dot1x system-auth-control
aaa authentication dot1x default group radius aaa authorization network default group radius aaa accounting update periodic 1 aaa accounting dot1x default start-stop group radius
aaa server radius dynamic-author client <CP IP> server-key aruba123! port 3799 auth-type all
ip dhcp snooping
ip device tracking
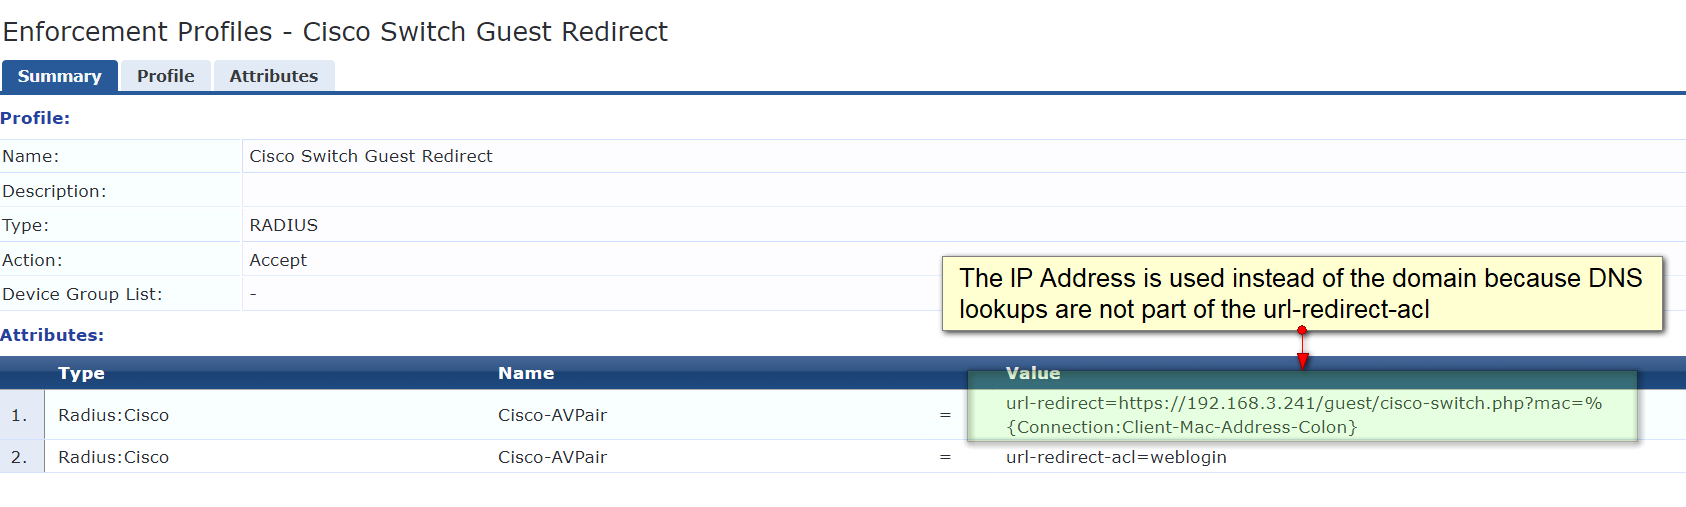
ip access-list extended weblogin deny tcp any host 192.168.3.241 permit tcp any any
radius-server host <CP_IP> key <RADIUS_KEY>
interface FastEthernet0/1 switchport access vlan X switchport mode access authentication order dot1x mab authentication priority dot1x mab authentication port-control auto authentication periodic authentication timer reauthenticate server mab dot1x pae authenticator dot1x timeout server-timeout 30 dot1x max-req 3 dot1x max-reauth-req 3 spanning-tree portfast !
Other useful switch config hints:
# Make sure the native VLAN is set for the trunk port
interface GigabitEthernet0/1 switchport trunk encapsulation dot1q switchport trunk native vlan X switchport trunk allowed vlan X switchport mode trunk !
This will setup a Virtual Switch Fabric or VSF on two switches that support this feature. Tested on a two 2930F 8 port. Switches are named Core-1 and Core-2
#on Core-1...

config t

#disable all interfaces
interface 1-10 disable

#set port 8 as primary vsf uplink
vsf member 1 link 1 8

#specify vsf domain
vsf enable domain 1

#reload the switch, after reboot check vsf status
show vsf
show vsf link
show vsf member 1

#on Core-2 get mac address and model
show system

#provision core-2 as standby... all commands still done on Core-1.. #aka commander. Switch type is model number

vsf member 2 type <switch type>
module 2 type <switch-type> mac-address <macaddress>

#on Core-2...
#disable all interfaces on core-2,except uplink to core-1 -> core-2
config t
interface 1-7,9,10 disable

#erase config and reload Core-2 after plugging in uplink to both switches
erase-startup config
As someone who routinely runs into this issue, I’ve also been wondering about this for the last few months. I bought an old Dell E176 on Ebay for console access. Recently when I needed it for upgrading a few computers, this became a issue. After reading through the forum posts, it’s clear that Dell monitors have problems with there memory settings (in the monitor’s hardware, not the PC) and coming out of power save mode.
Solution
Unplug the power cord for the monitor from the wall and wait for about 10 seconds, then replug-in the monitor. This should force the monitor to come out of sleep mode and re-calibrate it’s settings. Unplugging the VGA/DVI cable doesn’t do this.
Afterwards, set your desktop power settings to never sleep the monitor. Otherwise, do the aforementioned again.